
When remote learning took flight in March 2020, video conferencing platforms were the ultimate solution for continuing classes. While this method worked for many, STEM professors faced an unforeseen challenge. How would labs—a critical, hands-on component of any STEM class—be replicated digitally without petri dishes and microscopes at hand? How would students get the same learning experience without having their peers or instructors around them in person?
Top Hat makes it possible to bring STEM labs to life online, giving students access to a collaborative, interactive learning experience with an in-person feel, no matter where they are. Here’s how to set up your virtual lab in Top Hat in six steps.
1. Form your in-app teaching community
To begin, you should create a Top Hat course specifically for your lab. If you have multiple sections, you should create a Top Hat course for each. To do this, navigate to the “Courses” tab in the course lobby and click “Create Course.” You’ll be prompted to enter your course name, start date, subject and course code in the pop-up box. We suggest including a section number at the end of the course code so you can keep track of each section. Repeat this process as many times as needed.
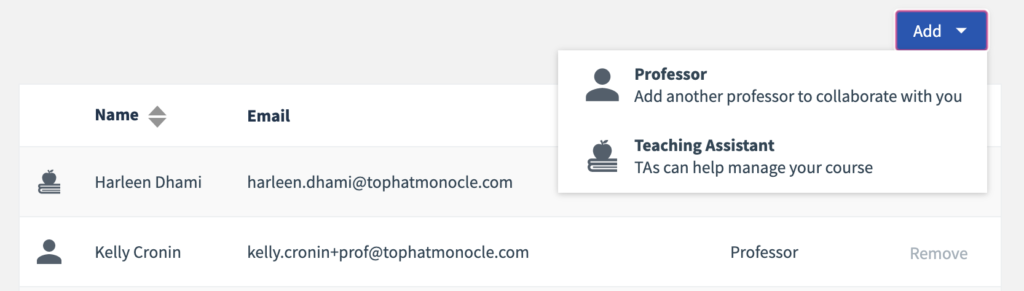
If you have teaching assistants (TAs) who run these labs, you can easily add them to the appropriate lab section by clicking on the downward arrow next to your name in the top right corner of your Top Hat course and select “Add Professor or TA.” From here, click “Add” and then “Teaching Assistant.” Input the email address for the TA you want to add and use commas for adding multiple TAs at once.
TAs added to your course will have access to course content such as slideshows, tests and interactive textbook materials. Note that TAs will not have access to Course Settings, the Gradebook or Student Manager. Granting TAs ‘professor status’ instead will provide full access to your course, allowing them to grade student submissions and more.
2. Start the learning before class
Pre-lab assessments are effective indicators of whether students have read the objectives and guidelines for an upcoming lab. Plus, students are given a chance to test their understanding of concepts before the lab begins—which may guide the questions they ask during the lab.
To create your assessment, start by creating a Page in Top Hat. The Pages editor will allow you to add a title and text to a page, much like a word processor. However, unlike Microsoft Word, it allows you to embed interactive elements such as questions, discussions, videos and iframes (external web pages) directly into your lab assignment. This can be handy in illustrating complicated topics. To do this, use the interactive toolbar on the page, click “Insert” and then “Video” or “iframe” and paste the URL or embed code into the pop-up box. PhET simulations, for example, are an open educational resource (OER) and housed on an external website that you can directly embed in the page. PhET simulations showcase STEM concepts in engaging and interactive ways. By embedding these as iframes into your Page, students can click through the simulation at their own pace and adjust the experiment settings to their liking.
Intersperse your pre-lab assessments with interactive questions to gauge comprehension and collect actionable student insights. Questions such as graded calculation and data graphing are designed to incorporate students’ measurements taken in the lab to formulate tables and graphs—perfect for your lab assignment. To create a new question in your page, navigate to the blue plus sign and select the question icon. Discussion questions are also a great addition for lab work as they allow for longer answers so students can explain their findings in detail. Embed a discussion question by clicking the discussion icon after selecting the blue plus sign. To maximize engagement, consider allocating one or two participation marks to the discussion question. You may also want to assign correctness points to understand how comfortable students are with the material.
3. Livestream your live lab
Top Hat’s virtual classroom capabilities allow you to seamlessly stream your lab from anywhere. To start your live steam, click on the “Create” menu and choose “Virtual Classroom.” A preview screen will allow you to see how you’ll appear in front of your students and ensure your computer’s microphone and webcam are working in advance of starting your video stream. In Virtual Classroom, attendance is recorded once per session, meaning students do not have to input a code on their devices. Top Hat Community, the messaging and collaboration app purpose-built for higher education, allows students to ‘raise their hands’ during the lab to verbally ask a complicated question using video conferencing. Top Hat Community also allows students to ask questions in a live chat and receive instant feedback from professors and TAs.
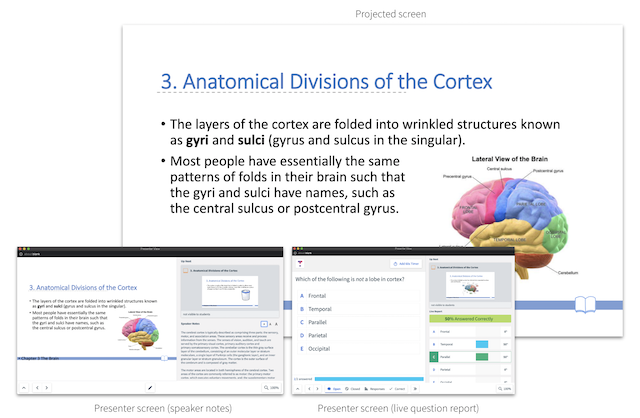
You can share your screen or slides in Top Hat during your lab to guide students through what you are doing. An in-app annotation, or whiteboard, feature allows for complex formulas and graphs to be sketched in real-time. In presenter view, click on the pen icon while your slides are open to draw directly onto the slides. This feature allows you to create new blank slides throughout your presentation as you proceed, ensuring you have space to draw diagrams and notes as needed.
Real-time lab quizzes allow you to test students on the fly. Before beginning your lab, create a folder for any in-class comprehension questions to be shown during the live lab. When in your folder, navigate to the “Create” menu to select from 14 question types including matching, sorting, and numeric answer among others and repeat the steps in the above section when inputting your questions. Once ready, simply click on the question or folder and select “Start Presentation.” After students respond in real-time, click “Correct” responses to show students what the correct answer was. This is also a good opportunity to facilitate discussion depending on the percentage of students who answered in a certain way.
At the end of your presentation, open the slide drawer in presenter view and click the downward arrow next to “End Presentation” and select “End and Assign Items to Review.” This step gives students a chance to review questions on their own while they study. It’s also beneficial for those who weren’t able to attend a synchronous lab due to different time zones and non-academic commitments, for example.
4. Create and grade file submissions for lab reports
The new file submission question allows students to draft and submit longer reports on their own time. Attach files to the question that students may download such as grading rubrics and in turn, students can submit PDFs, image files (PNG, JPEG and JPG) and Excel files (CSV and XLSX) up to 50MB. In your course shell, navigate to the “Create” menu and choose “Question” and then “File Submission.” Set your desired grade weight for participation and correctness. Note that manual grading is required for this question type to check for correctness. Assign the question by clicking the question in your Content Tree and click “Assign” as either homework or review. When submitting files, students may remove and re-submit lab reports as many times as desired before the due date.
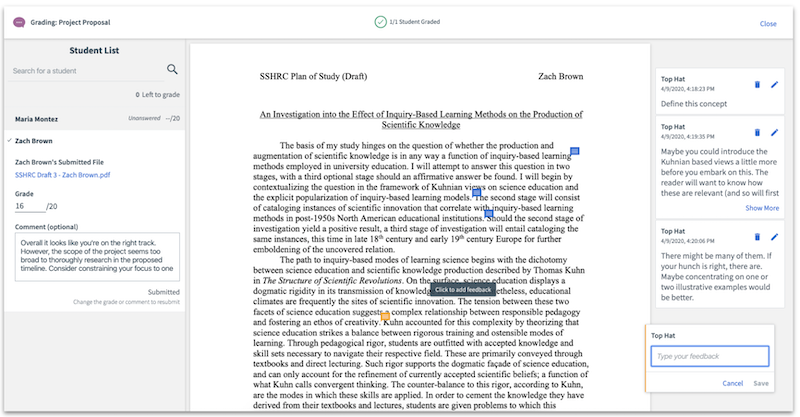
Providing constructive feedback is a crucial part of student learning. Critical, prompt commentary keeps students engaged and positions you as a support system for them to turn to. When grading reports, navigate to the Content Tree, then click “Question” and “Grade Responses.” Once in a student’s document, you can provide comments at specific locations in the file as in-line feedback—similar to a Google Doc—or you may provide feedback to the file as a whole, known as summary comments. Once done commenting, click “Submit” to make the student’s grade and comments visible if the homework due date has already passed. You may also consider hiding the Gradebook from students while submitted files are being processed to prevent students from panicking over not receiving their grades yet. Instead, you may release all grades at once after all papers have been reviewed.
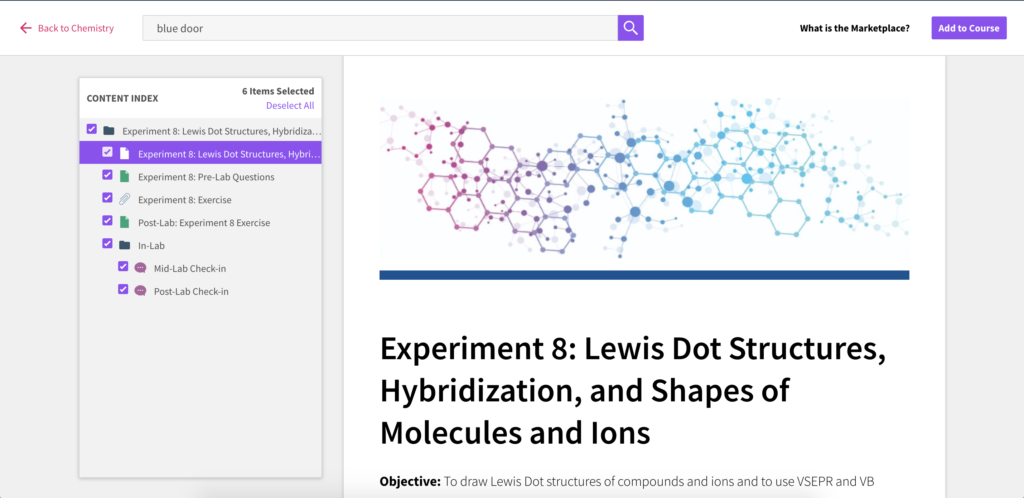
5. The Catalog brings lab manuals to life
The Top Hat Catalog is home to thousands of interactive question packs, textbooks and lab manuals created with our partners at Bluedoor Publishing. These lab manuals span various STEM fields, including anatomy and physiology, chemistry and biology. Adapt and choose from the manuals in the Catalog: the content you want to include in your course is up to you. When you find the right manual fit to your course’s learning objectives, you may select the entire manual to share with students or parts of it to be imported into your course. Customizable lab manuals are interspersed with exercises, PhET simulations and low-stakes questions that test understanding before, during and after your lab. Pre-existing manuals also help you concentrate your efforts on providing a memorable and meaningful in-class experience.
6. Maintain consistency across all lab sections
Ensure all students—regardless of which lab section they are enrolled in—have a similar experience with lab materials during and outside of class time. Your lab delivery and discussions should be aligned with student inquiries and individual needs; however, the bulk of your content should largely be identical across all sections. In your Content Tree, select the content that you want to copy to other lab sections and select “Copy.” From here, select the lab section(s) you would like to copy the content into and repeat for all necessary sections. It’s important to note that due dates don’t carry over into other lab sections, so ensure you re-assign homework within each individual lab section. For more details on how to set up your online lab in Top Hat, click here.
Top Hat makes it easy to engage and build community with STEM students before, during and after labs. Learn more about our interactive lab functionality here.